Travis CI is a CI service that is free for public github projects. In this post, I would like to shortly describe how you can use Travis CI to implement an automatic Docker deployment according to sloppy.io. The image is built, pushed and deployed to sloppy.io with the CI/CD workflow as soon as a git push is effected in the master branch of the project. You can find the used source code in Github for copy and paste.
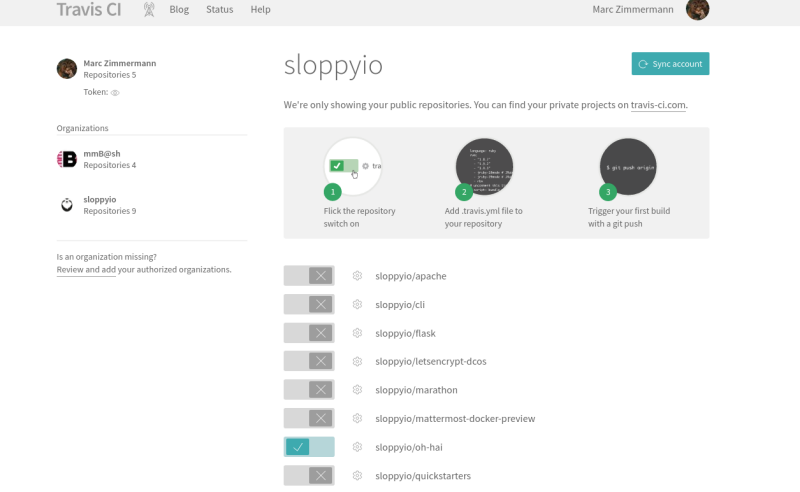
In the tutorial, we’ll assume you already have an existing Travis CI account that’s connected with a Github account. Afterwards, you can connect an existing public Github repository in the account menu with your own Travis CI account.
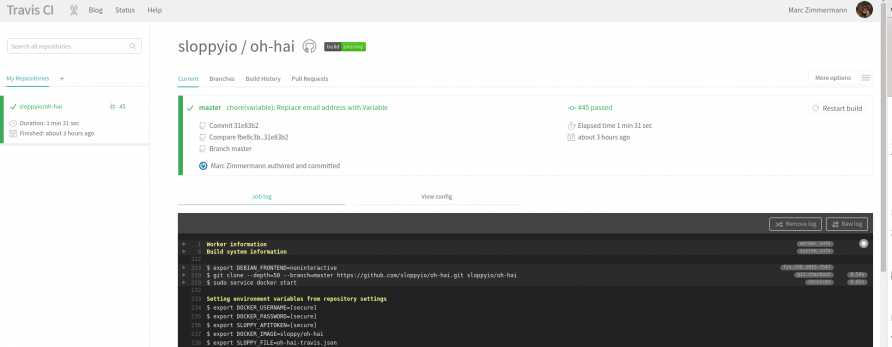
In this example, our sloppyio/oh-hai repository is connected with my Travis CI account.
Subsequently, you can access the project via the Travis CI dashboard.
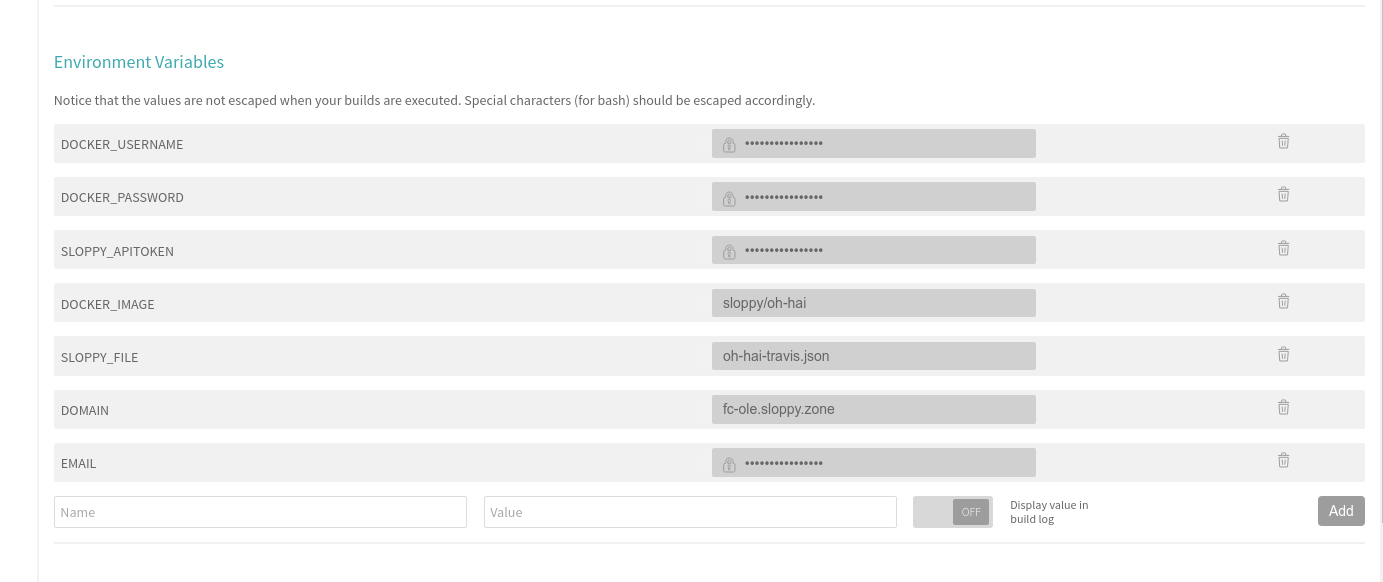
To continue, we need various variables – e.g. for the login at Docker Hub, as well as at sloppy.io. You can create variables at Travis CI via the project settings. The variables are encrypted by default, so you can among others record access data to the Docker hub.

We need the following variables:
- DOCKER_USERNAME: User for the Docker hub
- DOCKER_PASSWORD: Password for the Docker hub
- SLOPPY_APITOKEN: Token for using the REST API and the CLI of sloppy.io
- DOMAIN: Domain that the project will be available at
- SLOPPY_FILE: File name of the sloppy.json files, that have to be deposited additionally in the Git repository
- DOCKER_IMAGE: The image we want to build
- EMAIL: Email address for the error notification
In the oh-hai example of github, the variables have the following values:
- SLOPPY_FILE: oh-hai-travis.json
- DOMAIN: fc-ole.sloppy.io
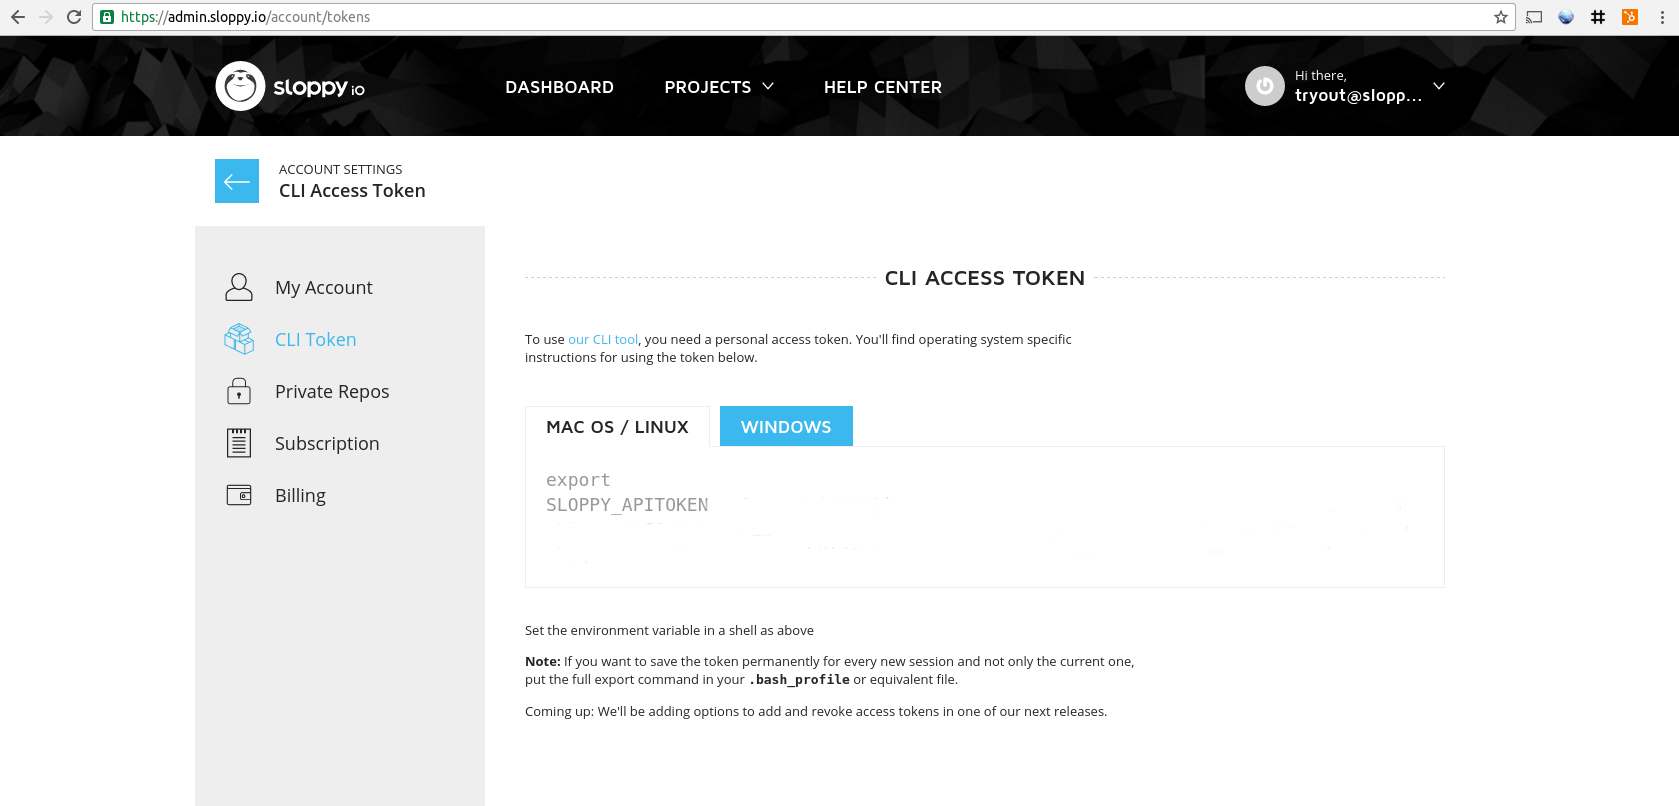
You can find the sloppy API token in the account settings of the sloppy.io UI.
The part after the “=” sign is sufficient.
The environment variables should look like this:
For the actual deployment workflow, Travic-CI uses yml files. They must be found in the root file of the Git project and bear the file name .travis.yml.
We use the following yml file for the how-to:
services:
  - docker

before_install:
  - docker build -t $DOCKER_IMAGE:$TRAVIS_COMMIT .
  - docker login -u="$DOCKER_USERNAME" -p="$DOCKER_PASSWORD"
  - docker push $DOCKER_IMAGE:$TRAVIS_COMMIT
  - docker run -d $DOCKER_IMAGE:$TRAVIS_COMMIT

script:
  - docker ps | grep -q sloppy

after_success:
  - curl -k -L https://files.sloppy.io/sloppy-`uname -s`-`uname -m` > sloppy
  - chmod +x sloppy
  - ./sloppy change -v docker_image:"$DOCKER_IMAGE:$TRAVIS_COMMIT" -v domain:"$DOMAIN" $SLOPPY_FILE

notifications:
  email:
    recipients:
      - $EMAIL
    on_success: never
    on_failure: always
Let’s go ahead and work on the single sections of the deployment workflows:
- services: We unlock the Docker service for the build so that from now on we can use Docker commands
- before_install:
- In the first step of this block, we build the image and use the pre-defined variables $DOCKER_IMAGE and environment variable $TRAVIS_COMMIT that contains the current Git commit of the repositories.
- We log in at the Docker hub with the pre deposited access data.
- Push the created image in the Docker hub.
- Run the created Docker image one time to test if the new build container starts.
- script: We test if the image built in step 2 was successfully started and there’s no error.
- after_success:
- Download the sloppy-cli.
- Make the sloppy-cli binary executable.
- Deploy the project with the variables-replacement-feature of the sloppy cli. By doing so, the variables docker_image in the sloppy.json with the current Docker image are replaced. The same applies for the domain v
In case of a sloppy change command, it doesn’t matter if a project already exists or not.
- notifications: Via notifications, we’ll get an immediate e-mail if an error occurred in “my build deploy pipeline.”
For reasons of simplification, the used sloppy.json from the projects follows:
{
  "project": "oh-hai",
    "services": [
        {
            "id": "frontend",
            "apps": [
                {
                    "id": "apache",
                    "domain": {
                        "uri": "$domain"
                    },
                    "mem": 512,
                    "image": "$docker_image",
                    "instances": 1,
                    "port_mappings": [
                        {
                            "container_port": 80
                        }
                    ],
                    "env": {
                        "MESSAGE": "Sloppy.io: Top Preise, Super Service"
                    }
                }
            ]
        }
    ]
}
And that’s it. From now on, for every push in the master branch, a Docker image is built and deployed to sloppy.io.
Coming Soon: TODOS
- Deployment in a group with several apps and several Docker images.
- Error treatment after starting a project with a corrupt image -> automatic rollback.
Don’t have a sloppy.io account yet? Sign up now, it’s free.