In the first part we used docker-compose to locally test and run our changes to the hackathon-starter. Currently, you always have to build the new docker image by yourself, push it to the hub and deploy it to sloppy.io using the UI or sloppy change. In any case, it would be more comfortable to let this work be done by a CI/CD tool like wercker.
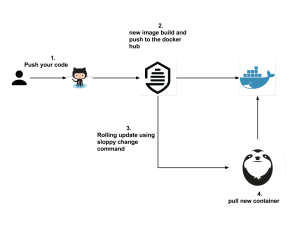
At the end of this post every push to the master branch of a GitHub repository will trigger:
- a new build
- a new Docker image
- a push to Docker Hub (quay.io is also possible)
- a rolling deploy at sloppy.io
How to start the initial version of the app
In the last blog post we created our own docker image using docker build -t yourdockerhubname/hackathon-starter:0.1 and pushed it to the hub with docker push yourdockerhubname/hackathon-starter.
Now, we deploy this initial version to sloppy.io by creating a sloppy.io JSON file. Let’s call it hackathon.json (replace DOMAINYOUWANT and YOURDOCKERHUBNAME with your needs):
{
    "project": "hackathon",
    "services": [
        {
            "id": "web",
            "apps": [
                {
                    "id": "node",
                    "domain": {
                        "uri": "DOMAINYOUWANT.sloppy.zone"
                    },
                    "mem": 512,
                    "image": "YOURDOCKERHUBNAME/hackathon-starter:0.1",
                    "instances": 1,
                    "port_mappings": [
                        {
                            "container_port": 3000
                        }
                    ],
                    "env": {
                        "MONGODB_URI": "mongodb://mongodb.backend.hackathon/starter"
                    },
                    "dependencies": [
                        "../backend/mongodb"
                    ]
                }
            ]
        },
        {
            "id": "backend",
            "apps": [
                {
                    "id": "mongodb",
                    "mem": 512,
                    "image": "mongo",
                    "cmd": "mongod --smallfiles",
                    "instances": 1,
                    "volumes": [
                        {
                            "container_path": "/data/db",
                            "size": "8GB"
                }
            ]
                    }
            ]
        }
    ]
}
Use the following CLI command to start the initial version of the todo app.
sloppy start hackathon.json
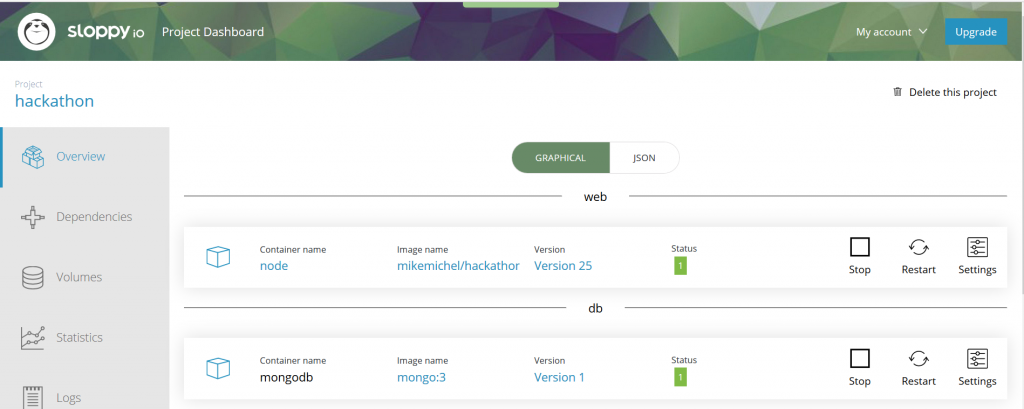
After a few seconds it shows up in the dashboard:
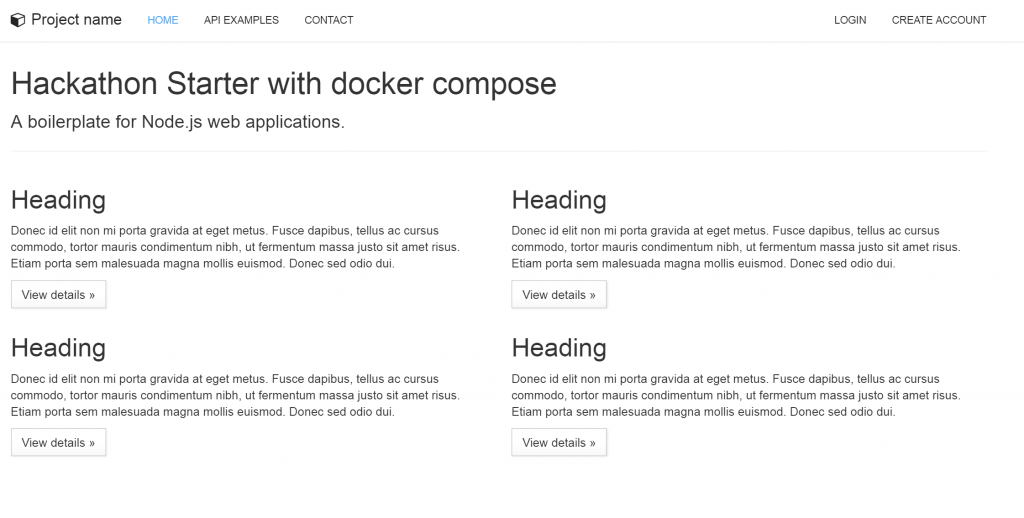
The app is available under the URI you defined by using the sloppy start command:
How to create a rolling update with wercker
What we now want to achieve is that every push to the master branch of our own git repo will do a rolling update to sloppy.io. As we cloned our git repo from hackathon-starter we have all the commits from the original repo in the history and our clone still points to the orig. repo so let’s fix this first. Create a new repo in GitHub (You have to be logged in)(I will name mine “hackathon”) Then do the needed changes for the cloned repo on the commandline:
cd myproject
rm -R .git # start with a clean git base
git init # initalize a new git repository
git add . # add all files for commit
git commit -m "initial commit"
git remote add origin https://github.com/YourGithubName/yourJustCreatedRepoName.git # use your own created repo here
git push -u origin master # push it
Now, let’s configure wercker so it will check out your GitHub repository and when there was a change it pulls the code, builds a new container from it and deploys the new version to sloppy.io.
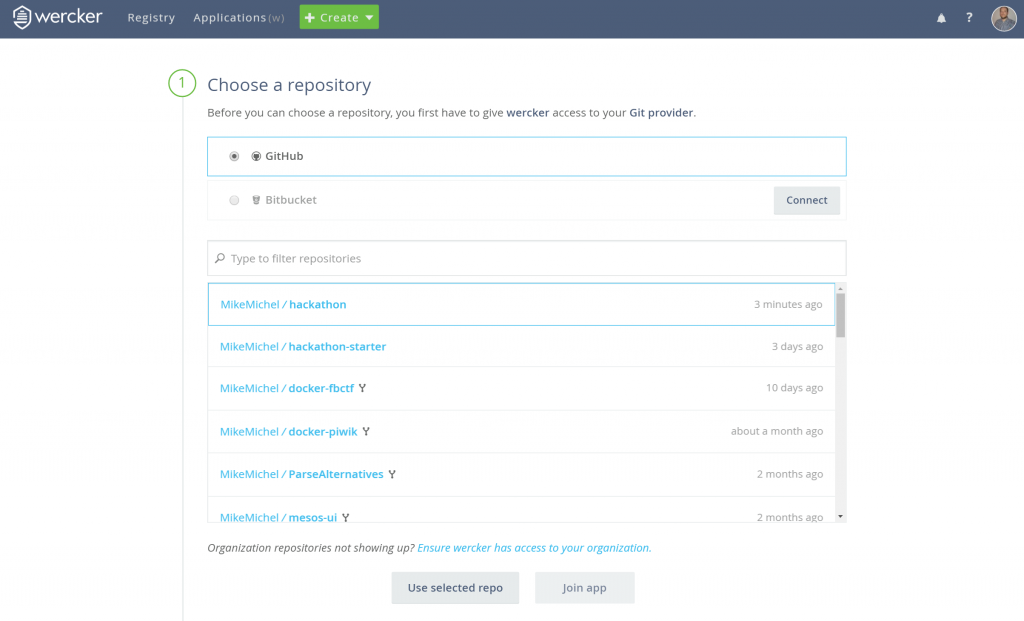
First, we create a new application:
Afterwards, we connect our repository following the provided steps:
Skip the next window where you can define a wercker.yml. We will create our own later but first we manage our workflow:
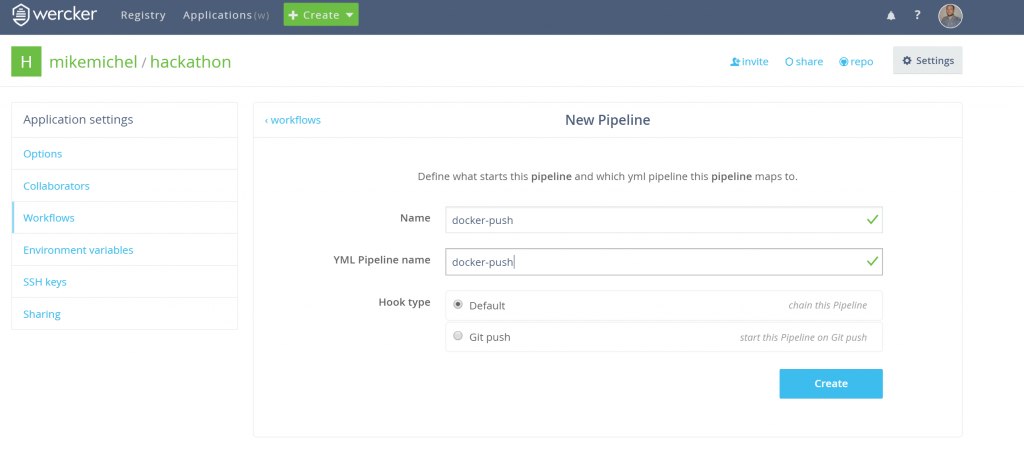
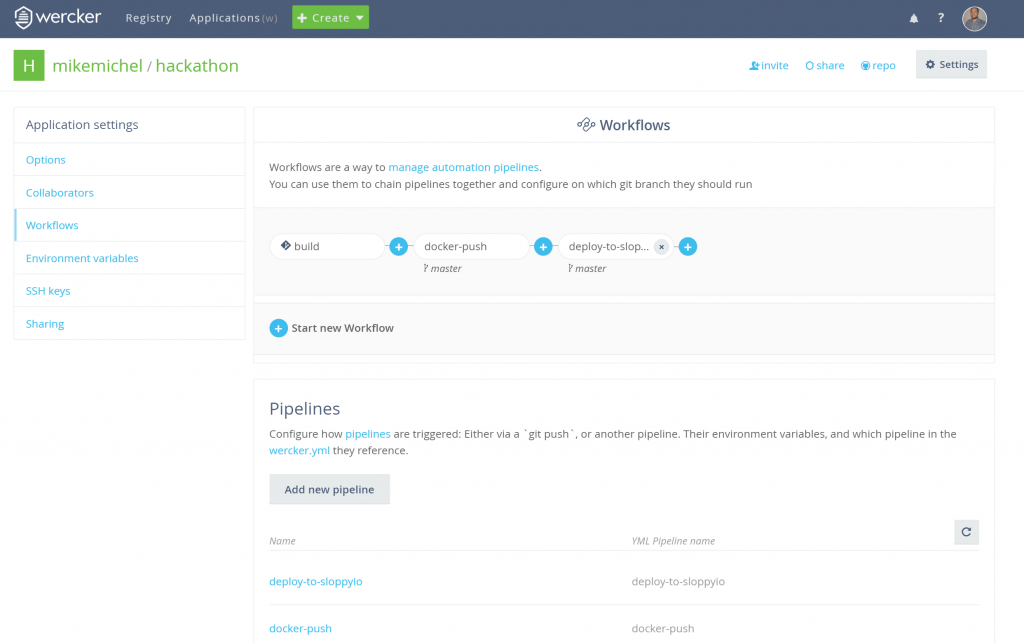
As we connected our GitHub repo there is already a pipeline named “build” in our workflow but we also want to push a new created image to dockerhub and deploy our app afterwards to sloppy.io. To achieve that we create 2 pipelines called “docker-push” and “deploy-to-sloppyio”:
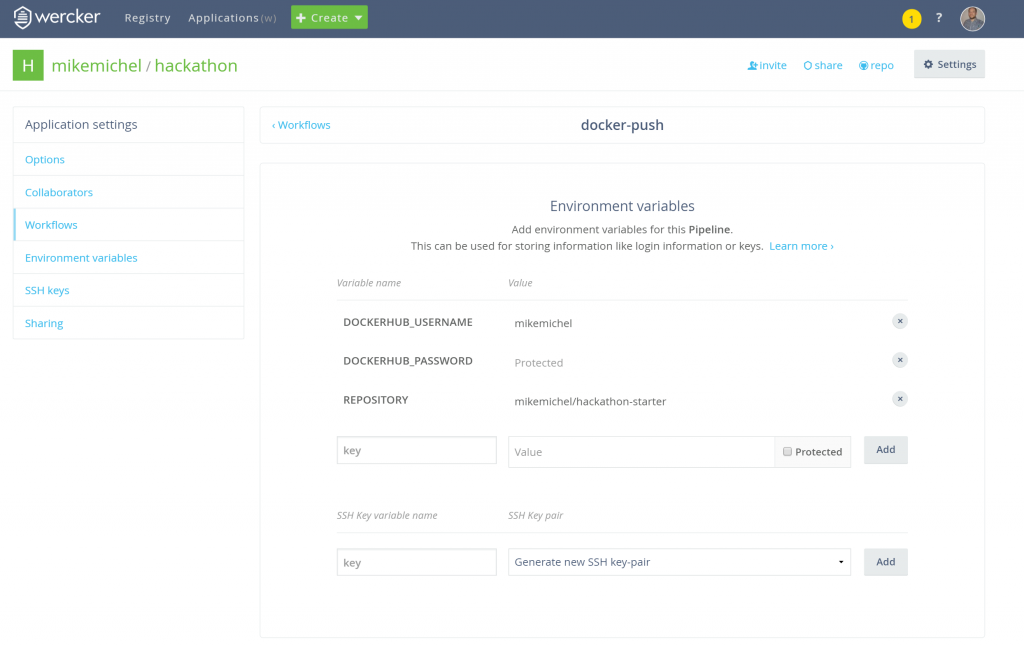
The “docker-push” pipeline will push our image to dockerhub, so we need to add our dockerhub credentials and the name of the repository we want to push as environment vars to the pipeline. For the “REPOSITORY” variable use your own repository name where you pushed your image from the initial push of the app. You should use the “protected” option in wercker when adding sensitive information:
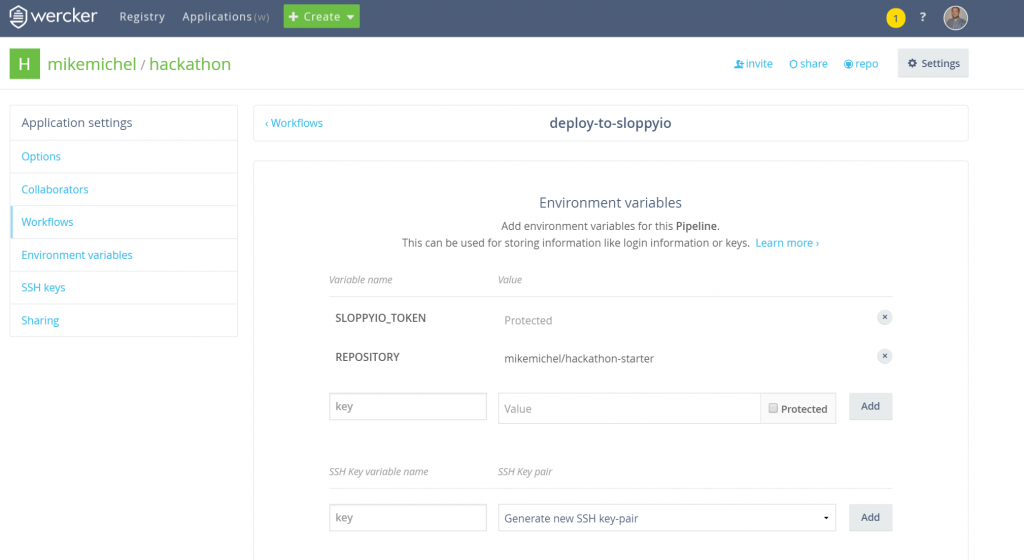
The “deploy-to-sloppyio” step needs the sloppy.io token. Get yours from https://admin.sloppy.io/account/profile (it’s the part after export SLOPPY_APITOKEN= ) and add it with the variable name SLOPPYIO_TOKEN as a protected env var to the pipeline.
Furthermore, this step needs to know which image to change, so let’s add here the env REPOSITORY with your own dockerhub repository as value too:
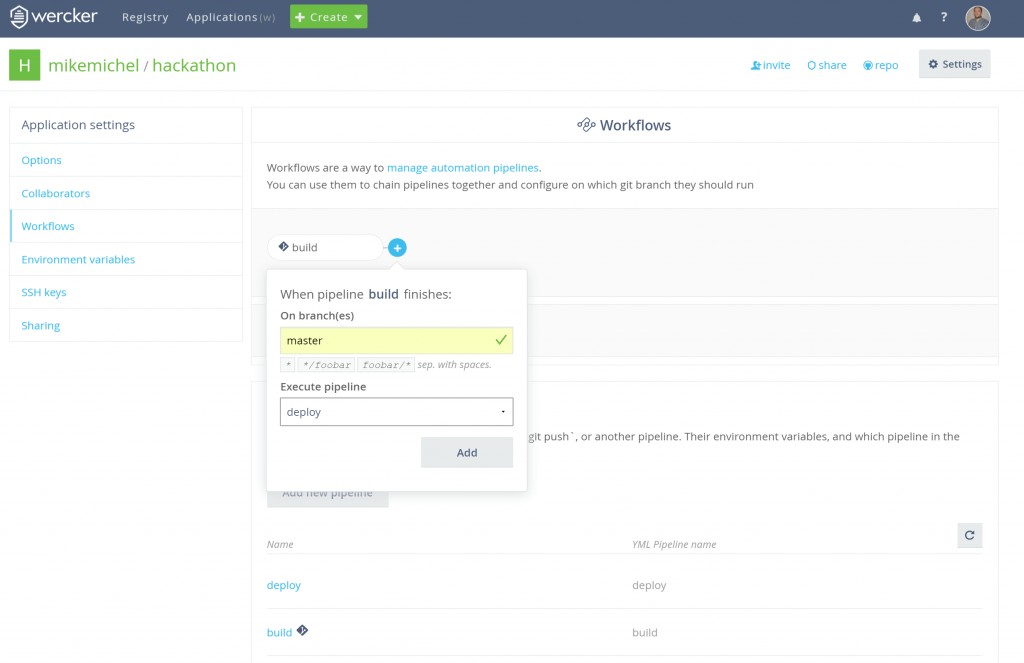
Go back to workflows and add the just created pipelines to our workflow:
As a result, we have a workflow using a build, a push and a deploy pipeline:
Now, we have to define in the wercker.yml what actually should happen during the flow. Copy the following lines and save as a file called
wercker.yml.
build:
  box: node:6.2-onbuild
  steps:
    - script:
        name: echo nodejs information
        code: |
          echo "node version $(node -v) running"
          echo "npm version $(npm -v) running"
          echo $WERCKER_GIT_COMMIT
    - npm-install
    - script:
        name: copy files to the pipeline
        code: cp -R . "$WERCKER_OUTPUT_DIR"
docker-push:
    box: node:6.2-onbuild
    steps:
    - script:
        name: copy
        code: cp -R /pipeline/source/. /usr/src/app/
    - internal/docker-push:
        #username: $QUAY_USERNAME
        username: $DOCKERHUB_USERNAME
        #password: $QUAY_PASSWORD
        password: $DOCKERHUB_PASSWORD
        ports: "8080"
        repository: $REPOSITORY
        #registry: https://quay.io
        tag: $WERCKER_GIT_COMMIT
        cmd: node app.js
deploy-to-sloppyio:
  box:
    id: buildpack-deps:jessie
  steps:
    - script:
        name: deploy to sloppy using the API with curl
        code: |
          curl -vvv -H "Content-Type: application/json" -H "Authorization: Bearer $SLOPPYIO_TOKEN" -X PATCH -d '{"image": "'$REPOSITORY':'$WERCKER_GIT_COMMIT'"}'  https://api.sloppy.io/v1/apps/hackathon/services/web/apps/node
Here, we will find our defined pipelines build, docker-push and deploy-to-sloppyio. The build part uses the official node:6.2-onbuild docker image to build the app. You can define steps to tell wercker what to do. There are predefined steps like npm-install. You can also define script steps which are executed the same way you type commands right into your terminal. This makes wercker very powerful as we can see in the “deploy” part. But first check the last step. Here we are using $WERCKER_OUTPUT_DIR of the many wercker environment variables to copy the app code after the “npm-install” to the wercker pipeline. So it can be used in the “deploy-to-sloppyio” step.
In the deploy part, we define again the node image and copy the app from /pipeline/source/ to /usr/src/app/ because the node image expects the app to be there and it just feels cleaner. The code is available in this directory because of the cp -R . "$WERCKER_OUTPUT_DIR" $WERCKER_OUTPUT_DIR environment variable from the step before. Then an internal wercker step is used to start the docker push because you can not use docker commands with wercker.
Here the environment variables we created in the UI are used to authenticate with the Docker Hub and do the push. You can also define ports and the cmd for this new image. We are additionally using another handy internal environment variable from wercker to tag the new image: The $WERCKER_GIT_COMMIT.
At the end we are deploying the new version to sloppy.io using the sloppy.io API
Now it is time for the rolling deploy
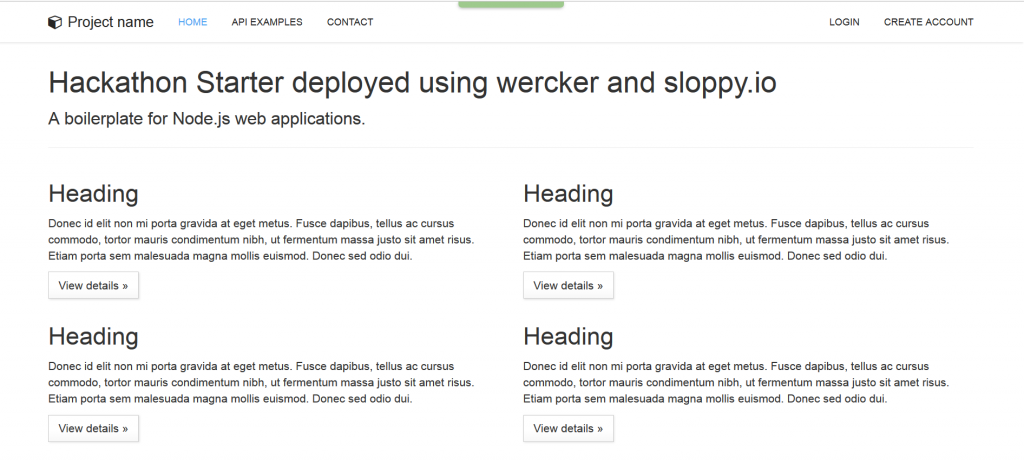
Change something in our hackathon app to make the rolling deployment more visible. Open views/home.jade and change the h1 header text to something you like:
h1 Hackathon Starter deployed using wercker and sloppy.io
Now save, commit and push the changes to your Git repo and wercker will start working. Follow the process live in the wercker user interface.
git commit -am "changed header"
git push
and watch wercker starting the flow:
Switch to the sloppy.io dashboard to see the rolling update of your app. You will also notice that the version number changed. Because of $WERCKER_GIT_COMMIT the image tag matches the Git Commit ID which helps when doing rollbacks.
The result
Now let’s check out the updated app:
Yay, the new version is online. Every push to your git repository will trigger another deployment. wercker.com comes with plenty more features and you can try it for free, so check it out. Don’t have a sloppy.io account yet? Get one!
You know some javascript? We are hiring!
